


DIY Guide to Installing a Train Horn System on Your Vehicle
Are you ready to turn heads and make a statement on the road? Installing a system in your vehicle is not just about sound; it’s about creating an unforgettable experience. Imagine cruising down the highway with a powerful blast that echoes like thunder, commanding attention wherever you go. Whether you're looking to enhance safety or want to have fun, a train horn can be the perfect upgrade for your ride. In this DIY guide, we’ll walk you through everything you need to know to install your Train Horn System. We've covered you, from gathering tools and materials to fine-tuning adjustments after installation. So grab your toolbox, and let’s dive into transforming your vehicle into something truly remarkable!
Benefits of Installing a Train Horn
A System can add a new dimension to your driving experience. One of the most significant benefits is enhanced safety. The loud, attention-grabbing sound alerts pedestrians and other drivers, helping to prevent accidents in busy areas or during low visibility conditions.
Recreational Enjoyment and Atmosphere Boost
Train horns are a hit at tailgating events, car shows, and social gatherings. Their powerful blast not only surprises and delights but also creates an exciting atmosphere, drawing attention and elevating the overall fun.
Practical Functionality for Larger Vehicles
For trucks, RVs, and other larger vehicles, train horns serve a practical purpose. Their upgraded honking power allows drivers to effectively alert others when necessary, enhancing road safety and communication.
Tools and Materials Needed
The right tools and materials are essential for installing a System. First on your list should be a quality set of wrenches. These will help you secure all fittings tightly to prevent air leaks.
You'll also need a drill with various bits to create mounting holes if necessary. A drill can make installation smoother, especially when fitting brackets or securing tubing. Consider getting an air compressor as well; it’s crucial for powering the horns.
Next, gather some heavy-duty wiring and connectors designed to handle high amperage. This ensures your System gets the power it needs without any risk of short circuits or damage. Don't forget about fuses—these protect your electrical components from overloads.
You’ll want durable mounting brackets that can withstand vibrations while driving. Specific brackets may fit better than others depending on your vehicle type, so check compatibility before purchasing.
It's wise to have extra zip ties and adhesive mounts handy. They offer additional support and organization for wires and hoses running along your vehicle's frame—keeping everything neat boosts aesthetics and functionality.
Safety Precautions
Safety should always be your top priority when installing a System. Start by wearing appropriate personal protective equipment. Safety goggles and gloves can help protect you from debris or accidental injuries while working.
Ensure the vehicle is parked on a flat surface. Engage the parking brake to prevent any movement during installation. This will create a safe environment for you to work without worrying about rolling away unexpectedly.
Before beginning, disconnect the vehicle's battery. Working with electrical components can lead to short circuits or even electrocution if you're not cautious. Taking this extra step ensures that there’s no power running through the system as you make your connections.
Keep all tools organized and within reach while working on your System. A cluttered workspace increases the chances of accidents happening, so it's essential to maintain order throughout the process.
Read through all manufacturer instructions carefully before proceeding with installation steps. Understanding how each component works together helps avoid mistakes that could compromise safety and functionality in your new train horn setup.
Preparing Your Vehicle for Installation: 12v Air Horn Kit
Before installing your 12v Air Horn Kit, it’s crucial to prepare your vehicle properly. Start by choosing a suitable location for mounting the horns. The front bumper is often ideal due to its visibility and accessibility.
Next, clear out any debris or obstacles in that area. This space should be free from dirt, as this can affect both the installation process and the performance of your new horn system. A clean surface makes everything easier.
You’ll also want to check for existing wiring or components near your chosen spot. Ensure there are no hidden electronic parts you might accidentally damage during installation. Familiarizing yourself with these details will save you time later.
Gather all necessary tools and materials before starting work on your vehicle. Everything at hand streamlines the process and minimizes interruptions once you install the System.
Consider disconnecting the battery before beginning any electrical work. This adds an extra layer of safety while you’re handling wiring connections. Taking these preparatory steps will help ensure a smooth installation experience down the line.
Installing the System
Start by locating a suitable spot under your vehicle’s hood or chassis for the System. Ideally, you want an area that allows for easy access and doesn’t obstruct other components. Mark where you intend to mount the air compressor and horns to ensure everything fits well.
Next, securely attach the air compressor using bolts or brackets provided in your kit. Ensure it's positioned upright to function correctly. Once mounted, connect it to a power source — typically directly from the battery. Use properly gauged wires for safety and efficiency.
Now, it’s time to install the train horns themselves. Depending on your design, you may need multiple horn placements. Position them strategically; this ensures optimal sound projection while maintaining aesthetic appeal.
After securing the horns, connect them with the appropriate tubing leading back to the air compressor. If necessary, apply Teflon tape to ensure all connections are tight and leak-free.
Run any required electrical wiring from the compressor and horns toward your vehicle's cabin, where you'll have complete control over its operation through a switch or button setup.
Testing the Train Horn Set
Once your Train Horn Set is installed, it's time to put it to the test. Begin by checking all connections and ensuring that everything is securely fastened. A loose connection can lead to poor performance or even complete failure.
Next, activate the horn using its switch or button. Listen carefully for any unusual sounds during this initial blast. A consistent tone indicates a successful installation, while unexpected noises may suggest issues with air pressure or leaks in the system.
It's also wise to check how quickly the horns respond when activated. They should sound immediately without delay. You should inspect your compressor and wiring again if there's a lag.
Testing in different environments can also provide valuable insights. Try sounding the horn in quieter areas versus noisy ones; this will help you gauge how effective your setup is in drawing attention.
Take note of how far away people can hear it. This feedback will validate your installation and give you an idea of its practical use on the road or at events.
Fine-Tuning and Adjustments: Train Air Horn Kit
Once your Train Air Horn Kit is installed, it’s time to refine its performance. This step ensures you achieve your setup's optimal sound and functionality. Start by checking the air pressure settings on your compressor. The correct pressure can significantly impact how loud and clear your horns sound.
Next, listen carefully to how each horn sounds when activated. Consider adjusting their positioning slightly for better resonance if they seem off or muffled. Sometimes, a slight angle change can create a more powerful effect.
Check all connections as well. Loose wires or fittings may interfere with sound quality or even cause intermittent issues with activation. A secure connection helps maintain consistent performance over time.
If you're not satisfied with the acoustics of the initial setup, you might also want to experiment with different mounting locations. Remember that vibrations from driving could affect the horns' output; finding a stable spot can help enhance clarity.
After adjustments are made, take care of maintenance. Regular checks on air lines and fittings ensure long-lasting reliability and efficiency for your Train Horn while keeping everything sounding sharp.
Conclusion
Installing a Train Horn System can be an exciting project. It offers more than just a loud sound; it adds personality to your vehicle, allowing you to connect with your car uniquely. Once you're set up, the thrill of using your new train horn is hard to beat. Whether for fun or safety, you'll appreciate the attention it commands on the road. It's a simple upgrade that transforms how others perceive you and how you feel behind the wheel. When done correctly, the installation journey provides hands-on experience and satisfaction. Mastering each step—from planning to execution—enhances your skills and confidence as a DIY enthusiast.
FAQs
What is a Train Horn System?
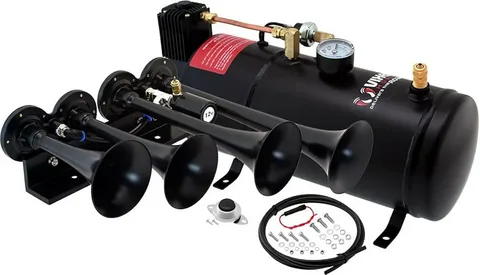
A Train Horn System mimics the powerful sound of traditional locomotive horns. It typically consists of an air compressor, tank, and one or more horn units that produce loud blasts when activated.
Is it legal to install a train horn on my vehicle?
Laws regarding loud horns vary by state and municipality. It's crucial to check your local regulations before installing your System to avoid potential fines or penalties.
How loud are these systems?
Train horns can reach decibel levels between 130-150 dB, making them extremely loud—often louder than standard car horns. This impressive volume ensures you get noticed on busy roads.
|
Related Business Listings |
Catégories
Lire la suite
The 2009 Hyundai Accent is equipped with a sun visor, a crucial feature designed to shield drivers and passengers from harsh sunlight. By blocking sun glare, the sun visor enhances visibility and reduces eye strain, contributing to safer driving conditions. This simple accessory can make a significant difference in your driving experience, ensuring comfort and clarity on the road. In this...
In recent years, the quest for natural and holistic health solutions has led many individuals to explore alternatives to conventional oral care products. Among these alternatives, Ayurvedic toothpaste has gained considerable popularity, especially for those seeking optimal oral health. Rooted in the ancient Indian practice of Ayurveda, this type of toothpaste offers a unique blend of natural...

When it comes to driving, the nuances of control and comfort can make all the difference. Enter the Vz V8 Power Steering Pump—a powerhouse component that transforms your driving experience from mundane to exceptional. Whether navigating tight city streets or cruising down open highways, this pump is pivotal in steering precision and ease. If you’ve ever wondered what makes your car...
Website - https://www.instagram.com/reddyannabook_id/ Contact US-6385433712 Introduction to Reddy Anna ID Enter the world of Reddy Anna ID, where passion for cricket meets cutting-edge technology. This platform isn't just another online exchange; it's a game-changer that transforms how you engage with your favorite sport. Whether you're placing bets on nail-biting matches or...

شركة الأمان المتقدم للاستشارات الهندسية: رائدة في تقديم الحلول الهندسية المبتكرة تعد شركة الأمان المتقدم للاستشارات الهندسية واحدة من الشركات السعودية الرائدة في مجال تقديم الخدمات الهندسية الاستشارية المتكاملة. تهدف الشركة إلى تقديم حلول هندسية عالية الجودة تتميز بالإبداع والابتكار، والتي تتماشى مع رؤية المملكة العربية السعودية 2030 في تطوير القطاعات المختلفة، خاصة في مجالات البناء والتشييد....
