


Replace the 2013 Nissan Pathfinder Sun Visor: A Step-by-Step Guide
Are you tired of struggling with a worn-out passenger visor in your 2013 Nissan Pathfinder? Dealing with an unreliable visor can be frustrating whether it’s frayed, cracked, or won’t stay up anymore. Thankfully, replacing it is not as daunting as it sounds. With the right tools and patience, you can restore your vehicle's interior functionality without breaking the bank. This step-by-step guide will walk you through everything from gathering the necessary materials to securing your new 2013 Nissan Pathfinder Sun Visor. After reading this article, you'll feel empowered and ready to tackle this straightforward project alone! Let’s dive into how to bring that passenger side back to life.
Tools and Materials Needed
Gathering the right tools and materials before starting your visor replacement project is essential. Having everything on hand will make the process smoother and more efficient.
First, you’ll need a flathead screwdriver. This handy tool is perfect for prying off any covers or clips that might be hiding screws. A Phillips head screwdriver will also come in handy when removing screws from the mounting bracket of your old visor.
Next, grab a pair of pliers. They provide excellent grip for unscrewing stubborn parts or quickly pulling out clips. If you have an electrical connector to deal with, wire cutters can help if adjustments are necessary.
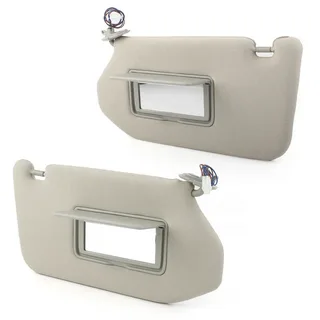
You’ll also want to invest in a replacement passenger visor designed for the 2013 Nissan Pathfinder. Once installed, ensure it matches your vehicle's interior colour and style for a seamless look.
Consider having some microfiber cloths available to clean up any dust or debris during installation. Keeping things tidy not only makes it easier but also helps prevent scratches on your new visor. With these tools and materials at your side, you're ready to move forward!
Safety Precautions: 2013 Nissan Pathfinder Passenger Visor
Safety should be your top priority when embarking on your DIY project to replace the 2013 Nissan Pathfinder Passenger Visor. Before you start, ensure you have all the necessary tools and materials. This will prevent unnecessary trips back and forth during the process.
Always wear protective eyewear when working inside your vehicle. Small parts can easily slip or fall into hard-to-reach areas, posing a risk of injury. Protecting your eyes is crucial to avoid any accidents while handling components.
Consider wearing gloves as well; they provide grip and protection against sharp edges or small debris that might be present in the car’s interior. This simple step can make working more comfortable and safer overall.
Work in a well-lit area where you can clearly see everything you're doing. Poor lighting can lead to mistakes, making it essential to ensure accuracy throughout the task.
If electrical connections are involved, remember to disconnect the battery before starting this job. This minimizes any risk of short circuits or shocks while replacing the visor. Taking these precautions seriously sets a solid foundation for a smooth replacement process.
Preparing Your Vehicle: 2013 Nissan Pathfinder Sun Visor Driver Side
Before replacing your 2013 Nissan Pathfinder Sun Visor Driver Side, it's essential to prepare your vehicle properly. Start by parking on a flat surface. This ensures you have a stable workspace and helps prevent accidents while you’re working.
Next, turn off the engine. For safety reasons, you’ll also want to disconnect the battery, especially if your new visor has an electrical component. Disconnecting the battery eliminates any risk of short-circuiting or unintended airbag deployment during installation.
Gather all tools and materials before beginning this project. Everything at hand streamlines the process and minimizes interruptions while working on your car's interior.
Also, consider removing any loose items from around your passenger seat area. This will give you more room and prevent damage to personal belongings during the repair process.
Put on gloves if you prefer keeping things clean or protecting your hands from potentially sharp edges when working inside the vehicle. Preparing creates an efficient workflow and enhances safety throughout this crucial task.
Removing the Old 2013 Nissan Pathfinder Sun Visor Replacement
Removing the old 2013 Nissan Pathfinder Sun Visor Replacement is straightforward. Start by locating the screws that hold the visor in place. These are typically found at the base, where it attaches to the headliner. Use a Phillips screwdriver for this job.
Safely Unscrew and Support the Visor
Begin by carefully unscrewing each fastener, keeping them organized if you plan to reuse them. As you unscrew, support the visor with one hand to prevent it from falling and causing any damage.
Disconnect the Wiring Harness
Gently pull down on the visor to reveal any attached wiring harness. For electrical connectors, press on their tabs and slowly pull them apart to avoid damaging sensitive components.
Inspect for Hidden Clips or Brackets
Examine both sides of the old visor for additional clips or brackets. These can sometimes be missed but need to be detached to ensure complete removal.
Installing the New 2013 Nissan Pathfinder Visor Replacement
Now it’s time to install the new 2013 Nissan Pathfinder Visor Replacement. Start by aligning the new visor with the mounting bracket on the roof. Make sure that any clips or hooks line up correctly. This alignment is crucial for a secure fit.
Once aligned, gently push the visor upward until you hear a click sound. This indicates that it has locked into place properly. Avoid applying excessive force; you want everything to fit snugly without damage.
Next, check if your new passenger visor has any electrical connections. If so, carefully guide the wires through their designated openings before securing everything.
After ensuring all components are aligned and connected, verify again that there aren’t any loose parts or misalignments before moving forward. A well-installed visor should sit flush against your vehicle's interior.
Press lightly on both ends of the visor to ensure it's firmly secured and won't rattle while driving. This is important for safety and comfort during those long road trips ahead!
Reconnecting the Electrical Connector: Sun Visor Nissan Pathfinder 2013
After successfully removing the old visor, it’s time to reconnect the electrical connector for your Sun Visor Nissan Pathfinder 2013. This step is crucial if your new visor has built-in lights or other electronic features.
Start by locating the wiring harness you detached earlier. Take a moment to inspect it for any signs of damage or wear. Ensuring these wires are intact will help prevent future functionality issues.
Align the connector carefully with its counterpart on the new visor. It should fit snugly without forcing it into place. If you encounter resistance, double-check that both connectors are correctly aligned before pushing them together.
Once they’re in alignment, firmly press until you hear a click sound, indicating that they have securely connected. A loose connection can lead to intermittent functionality, so ensure it's tight and secure.
After connecting, gently tug the wire to confirm it's locked in place. This small test helps ensure everything is ready for installation and will function correctly once reassembled. With this step completed, you're prepared to secure your new passenger visor into position next!
Securing the Nissan Pathfinder 2013 Sun Visor Replacement
With the new Nissan Pathfinder 2013 Sun Visor Replacement in place, it’s time to secure it properly. Start by aligning the visor's mounting bracket with the holes on the overhead console. Ensure everything sits flush against the vehicle's ceiling.
Using a screwdriver, carefully insert and tighten each screw one at a time. It’s important not to overtighten them; this could strip the screws or damage the bracket. Just snug enough will do.
Once all screws are secured, give a gentle tug on the visor to make sure it doesn’t wiggle or feel loose. An adequately installed visor should be stable and solid without any movement.
Next, check that any clips or additional components you removed earlier during installation are back in their rightful places. This ensures that everything looks neat and functions as designed.
Take a moment to inspect for any gaps between your newly installed passenger visor and the headliner of your 2013 Nissan Pathfinder. Everything should look seamless—this is key for both aesthetics and functionality.
Testing the New Replacement Sun Visor For 2013 Nissan Pathfinder
After installing the new Replacement Sun Visor For 2013 Nissan Pathfinder, it’s time to put it to the test. This step ensures everything is functioning correctly before hitting the road.
Start by gently pulling down on the visor to see if it swings smoothly. It should move without any resistance and return to its original position effortlessly. If you notice any sticking or unusual movement, double-check your installation for misalignments.
Next, check the mirror feature to see if your replacement visor includes one. Flip open the mirror cover carefully and ensure no cracks or defects in the mirror itself. A functional mirror adds convenience while driving.
Remember to test any additional features, like lights integrated into the visor. Turn on your vehicle's interior lights; they should illuminate when you open the vanity mirror flap. If they don’t work, inspect how you reconnected them earlier during installation.
Please take a moment to review how well it blends with other interior elements of your Pathfinder. A well-installed passenger visor should not only function correctly but also look good within your car’s design scheme, ensuring a seamless appearance inside your vehicle's cabin.
Conclusion
Replacing the 2013 Nissan Pathfinder Sun Visor is straightforward and can save you time and money. By following the steps outlined, you'll be equipped to tackle this project with confidence.
Having the right tools on hand makes all the difference. Ensure you have everything ready before starting to avoid any interruptions during the process. This preparation sets a positive tone for your DIY experience. Safety precautions should never be overlooked. Taking simple measures not only protects you but also ensures that your vehicle’s interior is not damaged while you work on it. The moment you install the new visor feels rewarding—you're giving new life to an essential part of your vehicle's functionality and aesthetics. Seeing tangible results from your efforts is always satisfying, especially when they enhance safety and comfort.
FAQs
Is it necessary to disconnect the battery while replacing the visor?
While not always mandatory, disconnecting the battery is a reasonable safety precaution if your new visor has electrical components. This will prevent accidental short circuits during installation.
How long does it typically take to replace a passenger visor?
Most DIY enthusiasts can complete this project in under an hour. However, the time may vary depending on your experience level and whether you encounter any unexpected issues.
What tools do I need for this replacement job?
Depending on how your current visor is mounted, you will generally need a flathead screwdriver or trim removal tool, a Phillips head screwdriver, and possibly a socket set.
|
Related Business Listings |
Κατηγορίες
Διαβάζω περισσότερα
Global Hadoop Big Data Analytics Market - Overview, Size, Share, Industry Trends and Opportunities Global Hadoop Big Data Analytics Market, By Component (Solution, Service,), Application (Risk and Fraud Analytics, Internet of Things (IoT), Customer Analytics, Security Intelligence, Distributed Coordination Service, Merchandising and Supply Chain Analytics, Offloading Mainframe...
According to a new report by UnivDatos Market Insights, the Global Software as a Medical Device Market was valued at USD 5,588.56 Million in 2023 and is expected to grow at a CAGR of 10.71% during the forecast period (2024-2032). This is mainly due to the desire for rapid growth, more and more companies are making mergers and acquisitions as ways to boost their production capacities and shares...
OSRS gold has grown substantially from its authentic browser-based roots these days, with Steamforged's board games being the latest effort through Jagex. Interviews with RSgoldfast closing July, several Jagex employees pointed out the idea of transitioning Runescape's mobile version to an open-supply release. Additionally in September of last yr, Jagex partnered with the writer of the famous...
Why Choose DumpsQueen? DumpsQueen is one of the most trusted platforms for exam preparation, and there are several reasons why students and professionals choose it over other resources: •Quality Content: DumpsQueen provides high-quality, accurate, and updated exam questions and study materials that reflect the latest exam patterns. •Comprehensive Coverage: Whether you are...
In the competitive hospitality world, the little details leave a lasting impression on guests. Imagine welcoming them with custom-branded soaps that elevate their stay and reflect your hotel’s unique identity. A thoughtful touch like this can make all the difference in how they remember their experience. Partnering with a Hotel Soap Supplier Sydney opens up exciting opportunities for...